|
|||
|
Even Steven presents:
A bLaRfAtHoN Production
(something about bLaRf and productivity just doesn't mix in there)
HOW TO MAKE
FLOATING POLYGONS
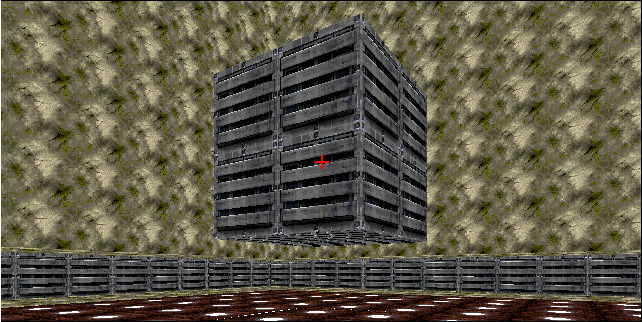
"What the hell is a floating polygon?" you ask. A floating polygon is an polygon or group of polygons that appears to float in the air but are actually either hanging from the ceiling or sticking up from the floor. If you already have no idea what I'm talking about, this isn't the web page for you :) Anyway, in this tutorial, you will (hopefully) learn how to make floating polygons.
"HOW THE HELL DO I DO THAT???!!!" Actually, its really easy, especially if you're aquainted with making split polygon stuff. If you're not, never fear, unless 777 people who really hate you have trapped you and are trying to finish you off. Then you can fear. Anyway though, anyone familiar with Forge should find this tutorial simple.
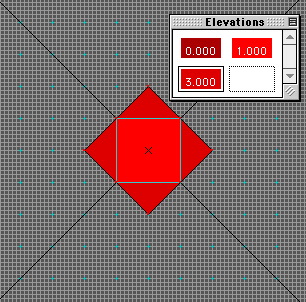
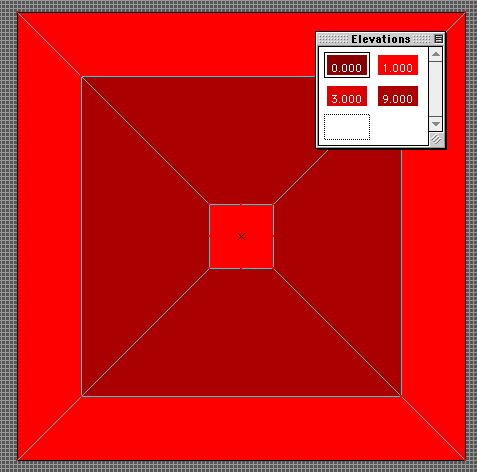
• STEP II In this tutorial, we'll be making a floating polygon that hangs from the ceiling. After you've filled in those 5 polys, you should change the elevation of their ceiling. Don't worry about the floor; its fine like it is. The middle poly is basically your floating box, while the triangles make it appear to float by covering up the rest of the middle poly. Give the middle poly a lower height; it is the lowest point of the floating box. Give the triangles the higher ceiling; that is the highest point. |
 |
• STEP III
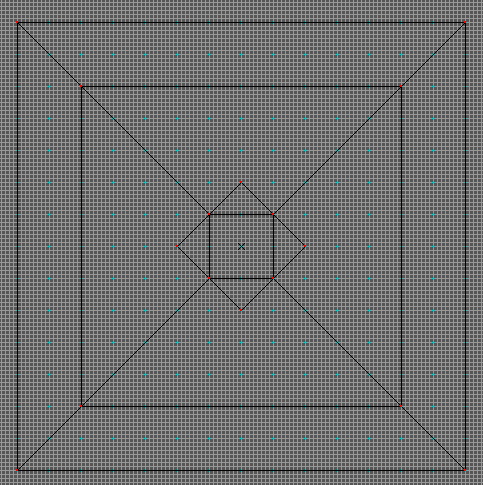
Now make the triangles part of the middle square (see below). You can do this by taking the point that isn't attached to the middle and move it to the line attached to the middle. Now the surrounding polygons should be fillable.
• STEP VI
Lastly, you'll want to run around your new map. Look everywhere. See if you can find any obvious glitches and try to fix them. You'll be amazed at waht you can find.
STEP VII
There is no step 7 ... however, you can look at one of the good uses of a flying polygon here. You can also download my example map, look at its beauty, and see if you can find any bugs.
