
|
|||
|
|
Windows and Terminals |
|

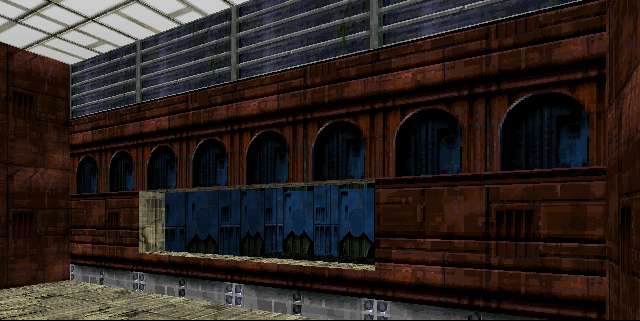
| 1) In Forge create two adjoining rooms joined by a window as shown in Figure 1. Fill only one of the rooms and the window poly. Give the filled room a ceiling height of 2 world units and a floor height of zero. Give the window a floor height of 0.3 and a ceiling height of 0.8. |
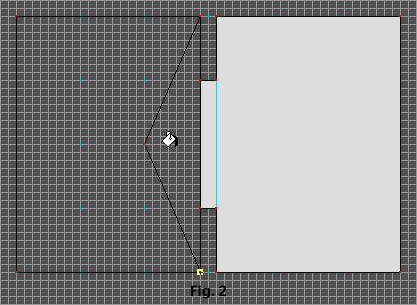
| 2) Draw a split poly as shown In Figure 2 and
fill it. Give it a floor height of zero and a ceiling height
of 1.5. Remember to apply steps 1a
through 1e in the general instructions when you fill a split
poly or I will visit you with a brick in my purse and a bug up
my butt. Close the poly by dragging its apex to the center of
the base line. 3) Draw a second split poly exactly as you drew the first and fill it. This time give it a floor height of 0.15 and a ceiling height of 2. Close the poly the same way you did the first one. 4) Fill the empty poly comprising the second room and set it's floor height to zero and its ceiling height to 2. 5) Place a player object into your map, Pave and save. 6) Go into your level and place your textures. |
| You can download an example map (4K) of this windows map and mess around with it. You should continue the split polys around the room, add a light object, put some drapes on the window, some Pfhor guts objects, a GUN for heavens sake, a couple magazines of ammo, maybe a secret door, a platform puzzle or two and some ambient and random sound but I didn't for the purposes of simplicity. After all, this is a tutorial on putting split polys over a window, not a tutorial on being anal. |
![]()
![]()