|
|||
|
|
Switches and Terminals |
|
|
1) Use your line tool to draw a small room. Add a rectangle
poly as shown in Figure 1. |
 5)
Back in draw mode, close the poly as shown in in Figure 2. 5)
Back in draw mode, close the poly as shown in in Figure 2. 6) Jump back into visual mode and check it out. Your Pattern Buffer is flat against the wall. It works just fine too. You can make those two patches, one on each side of the pattern buffer, the same texture as the surrounding wall or you can give them a unique texture to add more detail to the wall. |
|
Why did I use a rectangle split poly instead of a triangle split poly? Forge treats a vertex as a starting/stopping place when it is applying textures. You could have used a triangle poly to split the terminal in two, but you would run into a problem. Mainly, you have 2 terminals not just one. You may want to use this to make a comm term that seems to give a random message whenever you access it. Just break up the terminal with many vertices. As you texture each fragment of comm term, give it an individual script number. When you are finished texturing, Forge kindly arranges all the pieces of the comm term texture into one complete looking comm term. The difference being, which ever fragment you are exactly pointing at when you hit your action key in Marathon will have its own script number making it seem like the same term is giving you multiple messages, messages beyond the scope of the #FINISHED and #UNFINISHED comm term commands. You will run into the same problem with a triangle split poly and a switch or power up term. This will not resolve so nicely as the pattern buffer or comm term. You will see half of the switch activate or half of the power up term light up. Unless you have a specific purpose for doing something like that then you should stick with the rectangle split poly. You may want to use a triangle poly to create a side by side pattern buffer and power up term, just make the base line 1.5 world units long. 1 world unit for the pattern buffer and 0.5 world units for the power up. Again, these can lay flat on the wall, with the apex of the split poly being the vertex that separates the buffer from the power up after you close the poly. This next implementation of the Battle Cat's Split Poly is a refuge from the platform page. This trick will hide a terminal or switch that lays flat on a wall with a platform that also lays flat on the wall. The idea here is the classic hidden terminal/switch behind a secret door puzzle. 1) Create a small room with a rectangle poly on one side just
as in Figure 1. Fill them. |
|
5) Go back to draw mode and select the little rectangle and
give it a polygon type of "Platform". Use Figure 3
to set the parameters of the platform. Now go into visual mode and action key the wall where the secret door is. Your flat ass door slides right down and reveals a flat ass terminal. Can I say "ass" here? ass ass ass ass. Guess so. Anyway, this is not earth shattering stuff but it IS different and can add variety to your map. If you do not want to see the texture of the flat ass door slide down into the floor, you can put a split poly on that wall up to the bottom of the terminal. It will look like a flat ass cover sliding off the flat ass terminal. Put another poly behind the wall the terminal is on. Make it a platform. Hide it with split polys. That way you have to activate the platform to bring the terminal up behind the secret door as well as activate the secret door to finally reveal the terminal. |
| You can put these flat terminals and switches on things that are not negative space. To do this you need to use the other type of tBC's Split Polys, the Simple Split Poly. Say you want to put a switch flat on the side of a platform. |
 1)
Create a small room as in Figure 4. Fill the polys as shown. 1)
Create a small room as in Figure 4. Fill the polys as shown. |
| 2) Make the upper filled poly a platform and give it the parameters as shown in Figure 6. |
 3)
Close the split poly as shown in Figure 5 and fill the top poly. 3)
Close the split poly as shown in Figure 5 and fill the top poly.4) Make this top poly a platform also with the same parameters as Figure 6 with the exception of the min and max height. Make them zero and 1 respectively. |
 |
|
5) Create a light using the parameters from Figure 7. Push the button. You have a light switch laying flat on the side of a platform. You may want to make it a shooting puzzle. The player has to shoot the moving switch from a respectable distance to open a door enabling him to move on to whatever else you have in store for the pathetic bastard. Or not. The important thing here is you have another option of how to put a switch on a platform, one that not only takes fewer polys, it takes fewer platform polys. |
| It used to be impossible to put a switch on the side of a ledge, but with the Battle Cat's Split Poly Technology™ all bets are off. The very laws of nature are like silly putty in your hands. Do this one: |
 1)
Build a small room as shown in Figure 8. 1)
Build a small room as shown in Figure 8.2) Fill every poly except the big center poly. The trapezoid inside it will be your split poly. 3) Set the ceiling height of every filled poly to 2 world units. 4) Set the floor height of the split poly to 0.334 (just high enough you cannot step up on it). Remember to follow steps 1a through 1e in the General Instructions or I will ____ your ____ (fill in the generic threat or perversion of your choice). |
 5)
Close the split poly as show in Figure 9. 5)
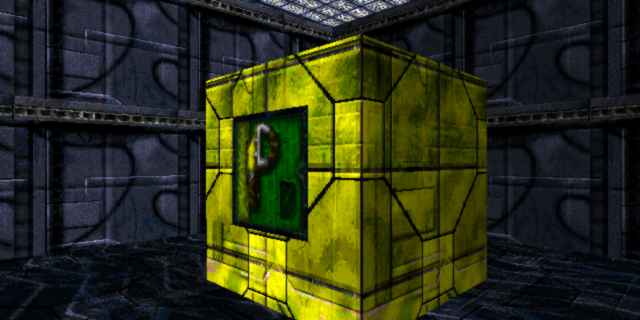
Close the split poly as show in Figure 9. 6) Draw a second split poly in the exact shape of the previous trapezoid in the same place. Fill it and set it's floor height to 0.834. 7) Close this second split poly the same as the first. 8) Fill the remaining center square poly and set its floor height to 1 world unit. 9) Place a player object in the room, pave and save. 10) Go into visual mode and when you texture the switch into the center of the face of the cube you have created, make the switch a light switch controlling the light you created in Figure 7. Make the entire room this same light. |
| Push the button. Nothing happened did it. What did you do wrong? Nothing, I can't say it is a bug in Marathon either because it was never designed to accommodate such a tricked out switch. For an in depth explanation check out Jason Harper's tutorial on the Pedestal Problem. The switch is not really dead, however it can only be activated by a weapon, something you don't have in Forge. Drag the map into your Marathon folder and go punch the switch. It works now. This is a drawback to this type of switch, you are forced to settle for it being only activated by weapons. Need some more bad news? You can't make this a pattern buffer, comm or power up term. So sue me. Join the class action law suit against me for creating such a lame way to apply a switch texture by sending 5 bucks care of "The Battle Cat's Litterbox", Citadel City, Lh'owon. Make sure you mark "Lexus Fund" on the envelope. The outside of the envelope. |
| Want to see something drool-cup-wacky that you would think would crash Forge? Draw another room just like in Figure 8. Fill it like you did the last one and do the ceiling height etc. This time give the split poly a floor height of 0.334 and a ceiling height of 0.834. Close the poly like you did before, fill the center square poly, give it a floor height of 1 and ceiling height of 2. Player object, pave, save and go look at it. Rather than crash, Forge seems to be covering for your lame ass for making such a stupid thing. Where did that zero thickness wall over the top of the face of the cube come from? As wacky as it looks and as normal as the other one looks, this one works perfectly. You can put any switch or terminal on it. There are always new surprises in Forge and Marathon, that is one of the reasons I love it so much. |
| You can download an example map (4K) showing some of these techniques. Joke goes here. |
![]()
![]()